Saturday, December 11, 2010

Haunted Mansion - Lighting


Done in Maya.
This was done in Mental Ray.
I  modeled, textured and did lighting for it.
1 Directional light as the moon (with intensity of 2).
The moon is just glowing to give a gradient across the sky.
1 Directional light at the back to separate the Haunted Mansion from the background (with intensity of 1.3).
5 Directional lights for the bounce of the sky (placed in north, south, east, west and 1 down).
All of them were facing down at 45 degrees (with intensity of 0.2). This was used for the bounce.
Another 5 Directional lights for the bounce of the sky (placed in north, south, east, west and 1 down).
All of them were facing down with 60 degree (with intensity of 0.2). This was used for the bounce,
and dont forget to sample the sky (I put  the same colour of the sky for the light).
5 Directional lights for the bounce of the ground (placed in north, south, east, west and 1 down).
All of them were facing up with 60 degree (with intensity of 0.2). This was used the bounce,
and dont forget to sample the ground (I put  the same colour of the ground for the light).
That's a total of 15 lights.
There are 5 point lights on the lamps, the candle stand had 2 each.
The 3 lamps had also had 3 poits lights.
The grass is Fur (It's the first time I did Fur).
I found LIGHTING FUR to be very difficult (any hints or tips to improve lighting for Fur?).
There are 3 spot lights on either side (Left - Right).
To get the correct highlights and the shadows took a long time and enormous effort.
The modeling, texturing and lighting took me 10 days to do.
It took around 12 minutes to render (with Fur) and around 7 minutes to render (without Fur).
All textures are made by me.

This is an occlusion pass.
This is how I modeled it and this is how it looks bare.
It took around 16 minutes to render.


I was trying out options.
I was trying different ways of lighting fur.
I didn't like the colour of the lights and the fur.
In this picture, the colour of the 15 Directional lights and the sky was different.


This is somewhat close to what I wanted.
But it had lighting just below the lamps which I did not like.
The lamps also looked very dull.


This was an attempt at fur lighting which was a disaster.
There was very little glow to the moon.


This was the first time I used fur and this is how it looked !!
Not too amusing and looks very fake.


This was a render without fur and just basic lighting.


I tried to get the floor bump but it didn't work out.
This was not nice at all.


I tried to give a grassy feel to it but turned out to be very green.


This was one of my first renders.
The house can barely be seen.
I did not like this render at all.

Chess Board - Lighting


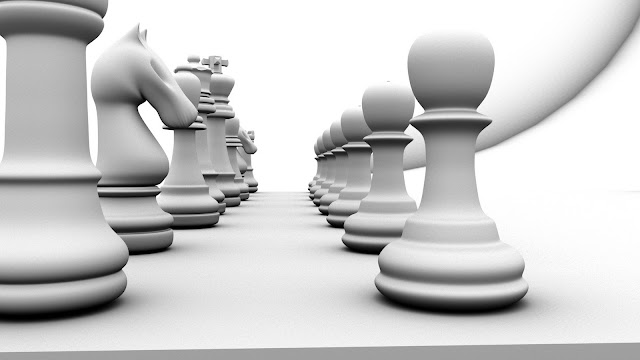
Done in Maya.
This was done in Mental Ray.
I  modeled, textured and did lighting for it.
2 Directional lights were used (with intensity of 1).
The first Directional light was linked to the board.
The second Directional light was linked to all the pieces.
I tried very hard to get a frosted glass texture (I hope it looks like that?).
Each piece has its own point light (with intensity of .2) linked to each piece.
Every object has high amount of  reflectivity.
This took around 7 minutes to render.
All textures and all the shaders (the frosted glass feel, the chess board, the black and white pieces) were all made by me.


This is a different view of the pieces with the same lighting set up.
This took around 7 minutes to render.


This is a different view of the pieces with the same lighting set up.
This took around 7 minutes to render.


This is a diffuse pass.
It took around 20 seconds to render.


This is an occlusion pass.
It took around 8 minutes to render.


This is the Z - depth pass. It helps give a sense of depth.
This took around 30 seconds to render.

Museum - Lighting

Done in Maya.
This was rendered in Maya software
I  modeled, textured and did the lighting for it.
1 Directional light as the Sun (with intensity of 1.75).
5 Directional lights were used for the bounce of the sky (placed in north, south, east, west and 1 down).
All of them were facing down at 45 degree (with intensity of 0.4). This was used for the bounce.
5 Directional lights were used for the bounce of the sky (placed in north, south, east, west and 1 down)
All of them were facing down at 60 degree (with intensity of 0.32). This was used for the bounce.
and dont forget to sample the sky (I put  the same colour of the sky for the light).
5 Directional lights were used for the bounce of the sky (placed in north, south, east, west and 1 down).
All of them were facing up at 15 degree (with intensity of 0.12). This was used for the ground bounce.
and dont forget to sample the ground (I put  the same colour of the ground for the light).
That's a total of 15 lights.
All textures are made by me.


This is a diffuse pass.
It looks very plain and dull.


This is an occlusion pass.
I find all occlusion pass very good, they make the model look very good.
This takes around 5 min to render.

This is a Z - depth pass and it helps give a sense of depth.

Friday, December 10, 2010

Beach House - Lighting


Done in Maya.
This was rendered using Maya software.
I  modeled, textured and did lighting for it
1 Directional light was used as the sun (with intensity of 2).
5 Directional lights were used for the bounce of the sky (placed in north, south, east, west and 1 down).
All of them were facing down at 45 degree (with intensity of 0.2). This was used for the bounce.
5 Directional lights were used for the bounce of the sky (placed in north, south, east, west and 1 down).
All of them were facing down at 60 degree (with intensity of 0.2). This was used for the bounce.
and dont forget to sample the sky (I put the same colour of the sky for the light).
5 Directional lights were used for the bounce of the ground (placed in north, south, east, west and 1 down).
All of them were facing up at 60 degree (with intensity of 0.2). This was used the ground bounce.
and dont forget to sample the ground (put the same colour of the ground for the light).
That's a total of 15 lights.
And 1 point light for each lamp.

Candle Light - Lighting


Done in Maya.
This was done in Mental Ray.
This is a downloaded scene.
I textured and did lighting for it.
I used Dielectric Material (A Mental Ray shader) for the glasses.
I did Caustics for it.
For the candles I used subsurface scattering.
I used 1 point light on each candle for the flame.
The glasses were done the same way like the Caustics glasses (Colourful Glasses - Lighting).
The incense sticks are nothing but a ramp shader and glow at the top.
The gold was done with the help of DGS Material (A Mental Ray shader).
I used a high ammout of GI (Global Illumination) and FG (Final Gather).
This took 32 minutes to render.

Colourful Glasses - Lighting


This was done in Mental Ray.
This is a downloaded scene.
I textured and did lighting for it.
I used Dielectric Material (A Mental Ray shader).
I did Caustics for this.
I used high ammount of GI (Global Illumination).
and FG (Final Gather).
For the green glass I put a point light in the bottom of the glass to get the effect.
For the red glass I put a point light at the rim of the glass to get the effect.
For the blue and yelllow glass I put a point light at the top of the glasses to get the effect.
It took 40 minutes to render.

Simple House - Lighting


This was done in Mental Ray.
This is a downloaded scene.
I textured and did lighting for it.
I used the following:
1 Directional light out side the glass as a sun light.
My FG (Final Gather) was 500.
I also used Secondary FG.
My GI (Global Illumination) was 500.
1 spot light on the lamp.
It took 35 minutes to render.


This was done in Mental Ray.
This is a downloaded scene.
I textured and did lighting for it.
It is the same scene but I added the pool table and the bottles.
I used the following:
4 spot lights for the lamps.
1 point light for each bottle.
1 point light under the table.
1 point light behind the Bar.
My FG (Final Gather) was 500.
I also used Secondary FG.
My GI (Global Illumination) was 500.
It took 37 minutes to render.

Treasure Chest - Lighting


This was done in Mental Ray.
This is a downloaded scene.
I textured and did lighting for it.
Tis is the first time I tried texturing.
I used the following:
1 point light in the lantern.
1 point light in the Glass, one on the plate.
And 2 spot lights on the same side of the camera.
It took 25 minutes to render. It was the first time that rendering took so long on my computer.
All the gems have glow in them.

Computer Room - Lighting


This is done in Mental Ray.
This was the first time I was trying Mental Ray.
I used the following:
1 spot light (from outside) and gave it fog.
I gave the fog noise and got the effect.
I used couple of point lights for the overall bounce.
I also used glow for the screen.

Home Theater - Lighting


This is done in Maya software.
I used the following:
2 spotlights.
1 main light from the back.
6 point light to give me the ambience.
Each chair had a spotlight behind it.
A volume light was used at the ceiling to get the ground bounce on the ceiling.
The front seat had purple point lights to get the illusion as if the screen was reflected on the chair.
All the modelling, texturing and lighting was done by me.
It took around 90 seconds to render.

Monday, December 6, 2010

Demo Reel


This is just the demo reel for now
but i am working on the main one

Sunday, December 5, 2010

Compositing


The
1: Sky
2:Ground
3:Front Trees
4: The Bird
5:The big moon
are all separate


The
1: Sky
2:Front Trees
3: The water
4:The big moon
are all separate

The
1: Sky
2:Burj al arab
3:Burj al arab shadow
are all separate


The
1: Sky
2:The front grass
3:The grain fields
4:The trees at the back
are all separate


The
1:Books
2:The glass beam
3:The front arch
are all separate

Editing


I used Fcp(Final Cut Pro)
to make this video
just made for fun

Blue Waters


This was done in water colour

Beautiful Sunset


This is a water colour painting

Dive into the deep blue sea

This is a water colour painting

Path Way


It is water colour paniting

Flower For You


This was done in water colour
one of my first painting

Face Of Her

Face To See

Hearing Aid

Footloose

Bald Headed

Furry Bear

Killer Bear

Man Eaters

Shy Deer